Creating Surgical Guides & Provisional Workflows

1. The Importance of Pre‑Surgical Lab Involvement
When the lab is involved early in treatment planning, ideally before any surgical intervention, it ensures that implant placement is prosthetically driven, not surgically driven. This means the implants are placed based on the final restoration design (esthetics, function, and occlusion), not just bone availability. This collaboration begins with digital records (intraoral scans and CBCT) and a clear treatment vision. It reduces errors, streamlines guide creation, and enhances implant longevity.
2. Case Evaluation: What the Lab Needs to Know
Before designing a guide or prosthesis, labs need comprehensive documentation:
- DICOM files from CBCT
- Intraoral or model scans (STLs)
- Opposing arch data
- Bite registration and vertical dimension
- Photos for esthetic mapping (smile line, midline, gingival display)
- Any medical history, such as bruxism or bone deficiencies
This input helps labs assess surgical access, prosthetic space, bone availability, and tissue support, essential to avoid complications.
3. Digital Planning
Using implant planning software (e.g., BlueSky Plan, 3Shape Implant Studio), the lab overlays the DICOM and STL files to create a 3D digital patient. Here they simulate:
- Implant trajectories (considering bone, nerves, and prosthetics)
- Sleeve positioning for guided surgery
- Future tooth positions and emergence profiles
Clinicians and labs co-review plans virtually before they are approved. Some labs even offer real-time Zoom sessions for case planning and review.
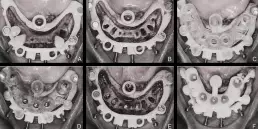
4. Designing Surgical Guides
CAD-designed surgical guides are the backbone of precision implant placement. Labs choose:
- Tooth-supported, mucosa-supported, or bone-supported guides, depending on edentulism and stability
- Sleeve positions and diameters per surgical kit
- Whether to incorporate stackable guides (e.g., bone reduction guide + implant guide + prosthetic seating guide) in complex cases
These design elements ensure accurate angulation, depth, and position during surgery.
5. Guide Fabrication
Guides are 3D printed with biocompatible surgical resins and post-processed to meet sterilization standards. Some labs install metal drill sleeves to match specific guided surgery systems (e.g., Nobel, Straumann). The guides are physically tested on printed models for:
- Passive fit
- Stability under finger pressure
- Clearance from soft tissue and opposing dentition
6. Verification and Fit Check Before Surgery
Before surgery, the dentist is advised to trial-fit the guide on the model or in the mouth:
- Does it seat passively?
- Does it rock or shift?
- Are the sleeves aligned properly with the proposed osteotomy?
Any misfit at this stage could lead to surgical inaccuracy. Labs often include a checklist or model to help verify seating.
7. Dental Lab and Dentist Communication
The strongest labs in Minnesota invest in:
- Clear case intake forms (with implant brand, desired restoration, timeline)
- Visual proofs for guide designs
- Virtual consults for tricky cases
- Easy access for post-op feedback
This synergy avoids back-and-forth miscommunication and aligns expectations around aesthetics, cost, and delivery.
8. Final Prosthesis
After implant placement and healing, the lab receives updated impressions or intraoral scans. The final prosthesis (zirconia, PMMA, or layered materials) is designed with:
- Correct occlusion and functional parameters
- Gingival contouring for hygiene access
- Custom shading or monolithic strength
Final verification includes articulation testing, occlusal contact mapping, and margin integrity.
9. Building an Integrated Workflow
An “integrated” workflow ensures there are no breaks between digital steps. That means:
- CBCT and scan data flow into the same software
- Guide planning flows into temporary prosthesis design
- Provisional design informs the final prosthesis
- Adjustments in one phase auto-update in the next
Labs achieve this by using unified platforms like 3Shape, Exocad, or BlueSkyBio and working closely with clinics to manage the entire journey from data acquisition to final smile.
Latest News
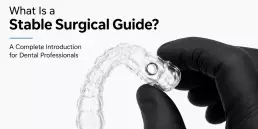
What Is a Stable Surgical Guide? A Complete Introduction for Dental Professionals
A stable surgical guide is a key factor in successful implant dentistry, ensuring precise transfer of digital plans into the patient’s mouth. Excellence in 2026.
Stackable Surgical Guides in Dentistry: The Future of Precise Dental Implants Surgery
Advances in intraoral scanning, optimized scan protocols, and lab-driven validation provide clinicians and dental labs with powerful tools for excellence in 2025.
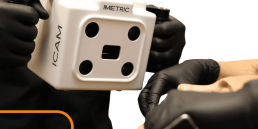
ICAM Photogrammetry: How Confident Dental Lab Delivers Once‑Impossible Full‑Arch Implant Precision
Advances in intraoral scanning, optimized scan protocols, and lab-driven validation provide clinicians and dental labs with powerful tools for excellence in 2025.
Zirconia Crowns: Benefits, Types, and Why Dentists Prefer Them
Zirconia crowns consist of zirconium dioxide, a crystalline ceramic engineered for exceptional toughness in restorative dentistry.